
How to Charge LiFePO4 Batteries with Solar?
On our test bench, we still see good batteries perform badly because one wrong solar setting causes weak charging, poor balancing, or random BMS trips.
To charge LiFePO4 batteries with solar, use a lithium-capable charge controller or a compatible hybrid inverter, set the correct bulk voltage for the pack, keep absorption short, use little or no float, disable equalization, and stop charging when the battery is too cold.

The good news is that modern solar charging is often simple. In some systems, battery communication handles most of the settings. In simpler 12V systems, you usually need a separate charge controller and manual voltage setup. The key is knowing which system you actually have.
- Solar Charging Basics for LiFePO4 Batteries (How It Works)
- What You Need: Panels, Charge Controller, Cables, Fuses, and a BMS
- MPPT vs PWM: Choosing the Best Solar Charge Controller for LiFePO4
- LiFePO4 Solar Charge Settings (Bulk/Absorption/Float Voltage Guide)
- Step-by-Step Wiring: How to Connect Solar Panels to a LiFePO4 Battery
- Safety Tips and Common Mistakes (Low-Temperature Charging, Overvoltage, Cutoffs)
Solar Charging Basics for LiFePO4 Batteries (How It Works)
In our field work, we often find LiFePO4 batteries charged with lead-acid logic, and that is where many performance problems begin.
LiFePO4 solar charging usually follows a constant-current and then constant-voltage process. Solar panels feed a charge controller or hybrid inverter, which limits current and voltage for the battery. In communication-based systems, the BMS may also tell the inverter or charger exactly how much current and voltage the battery can accept.
The basic charging path
A solar panel does not charge a LiFePO4 battery correctly by itself. Solar power changes all day. Panel voltage changes with sunlight and temperature. Battery charging needs control. That is why a controller or a hybrid inverter sits between the PV array and the battery.
The normal charging pattern for LiFePO4 is simple. First, the charger delivers current until the battery reaches the target voltage. Then it holds that voltage for a short period. This is the constant-voltage stage. After that, most LiFePO4 systems do not need a traditional lead-acid float stage.
This matters because LiFePO4 is not lead-acid. It does not want long soaking at high voltage. It does not want equalization. It also does not use the same temperature-compensation behavior. So the first rule is easy: the charger must support a LiFePO4 profile or let you build a proper custom lithium profile.
Systems with communication vs systems without communication
This is where solar charging has become easier than before.
In a modern storage system, the inverter may already include the solar charge controller. If the battery and inverter communicate successfully, the BMS can send charging limits directly. In that case, you may not need to manually enter bulk voltage, float voltage, or current limits. The battery tells the inverter what it wants, and the inverter follows that instruction.
In a simpler system with no communication, especially a 12V setup, you usually need a separate solar charge controller. You will likely set the lithium battery profile yourself. You may also need to set float voltage, recharge thresholds, and low-voltage cutoffs manually.
That is why two systems that both use LiFePO4 can look very different in practice.
| System Type | Separate Controller Needed | How Charging Is Controlled | Best Use Case |
|---|---|---|---|
| Hybrid inverter with battery communication | Usually no | BMS sends limits to inverter | Modern home storage |
| Hybrid inverter without battery communication | No | Manual inverter settings | Simple integrated systems |
| Small 12V or 24V DC system | Usually yes | Manual charge controller settings | RV, cabin, telecom, marine |
| Larger parallel battery bank | Yes or built-in | Manual or managed, plus busbar design | Off-grid or backup systems |
What this means in the real world
Today, charging LiFePO4 with solar can be very easy. If the battery and inverter communicate properly, setup is often minimal. But if there is no communication, then setup still matters a lot. In that case, do not assume the default settings are safe. Many defaults were designed for lead-acid batteries, not LiFePO4.
So the real starting point is this: first identify whether your system is managed by communication or controlled by manual settings. Then configure it the right way.
What You Need: Panels, Charge Controller, Cables, Fuses, and a BMS
On our assembly line, the most common charging problems do not come from the battery chemistry. They come from missing or badly matched system parts.
A reliable LiFePO4 solar setup needs more than a panel and a battery. You need a lithium-capable controller or compatible hybrid inverter, a working BMS, correctly sized cables, fuses or breakers, a safe disconnect method, and ideally voltage and temperature sensing close to the battery.
The essential hardware
Start with the battery and its BMS. The BMS protects the cells from overvoltage, undervoltage, overcurrent, and unsafe temperatures. It is a protection device, not a daily control strategy. You should not design the system so the BMS trips all the time. A good design prevents those emergency limits from being reached in normal use.
Next is the solar charging device. This can be a dedicated MPPT controller or a hybrid inverter with built-in solar charging. In many newer systems, the inverter already includes MPPT and inverter functions together. That reduces hardware count and simplifies installation.
Then come the parts that people often underestimate: cables, lugs, busbars, fuses, breakers, and voltage sense. LiFePO4 has a narrow top-of-charge window. Small voltage drop in long or thin cables can make the charger think the battery is full too early. That causes chronic undercharge. It can also confuse balancing behavior near full charge.
Recommended component checklist
| Part | What It Does | What to Check | Common Mistake |
|---|---|---|---|
| Solar panels | Provide charging power | Voc, Vmp, wattage, cold-weather design | Ignoring cold Voc rise |
| Charge controller or hybrid inverter | Controls charge current and voltage | LiFePO4 profile, current rating, PV input limit | Using lead-acid settings |
| BMS | Protects cells | Charge limit, discharge limit, temp cutoff, communication | Treating BMS trip as normal |
| Battery cables | Carry charging and load current | Ampacity, voltage drop, lug quality | Using cable that is too small |
| Fuse or breaker | Limits fault current | Correct location and rating | No fuse near battery positive |
| Busbar | Balances current paths | Proper current rating and layout | Daisy-chaining batteries |
| Temperature sensor | Stops unsafe cold charging | Location and compatibility | No temperature protection |
| Voltage sense | Improves charge accuracy | Measure at battery terminals | Measuring only at charger |
Current and cable sizing basics
Charge current must stay within the battery specification. Many LiFePO4 batteries allow strong charging, but that does not mean you should ignore the rated limit. A common upper guideline is up to 1C, but many systems are happier below that. For example, a 100Ah battery may allow up to 100A charging, but many installers choose lower current for thermal margin and better system balance.
Cable sizing is just as important. Long cable runs increase voltage drop. Thin cables increase voltage drop even more. At low battery voltages, a few tenths of a volt can create bad charging decisions. Keep runs short. Use thick cable. Measure voltage at the battery terminals during charging, not only at the controller display.
One more rule for parallel batteries
If you parallel multiple LiFePO4 batteries, do not connect them casually. Give each battery its own fuse or breaker. Use equal-length positive and negative cables. Land them on common busbars. This helps current share more evenly and reduces the chance that one battery’s BMS trips before the others.
MPPT vs PWM: Choosing the Best Solar Charge Controller for LiFePO4
In our system reviews, PWM still appears in basic builds, but MPPT wins in most serious LiFePO4 applications.

MPPT is usually the best solar charge controller for LiFePO4 because it harvests more energy, accepts higher PV voltages, and works better with modern solar modules. PWM can work in small matched-voltage systems, but it gives up efficiency, flexibility, and often real-world charging performance.
How they differ
A PWM controller is simple. It effectively connects the panel to the battery in pulses. Because of that, the panel must be closely matched to battery voltage. This works in very small systems, but it is restrictive.
An MPPT controller is smarter. It tracks the panel’s maximum power point and converts higher PV voltage into usable battery charging current. That gives you more design freedom, better harvest in variable weather, and better use of common high-voltage solar modules.
For LiFePO4, this usually matters because the battery voltage curve is flat for much of the cycle. If the controller is weak or badly matched, the battery may spend many days never reaching a proper top charge. That hurts balancing and long-term performance.
When PWM is still acceptable
PWM is still acceptable in some basic cases:
- Small 12V systems
- Low-cost builds
- Panels designed for 12V battery charging
- Short cable runs
- Modest daily energy needs
But once the system gets larger, or panels are mounted farther away, or the climate is cold, MPPT usually becomes the clear better option.
| Topic | MPPT | PWM | Best Fit |
|---|---|---|---|
| PV voltage flexibility | High | Low | MPPT for most modern systems |
| Energy harvest | Better in changing conditions | Lower in many cases | MPPT for performance |
| Module compatibility | Wide | Limited | MPPT for modern panels |
| Biaya | Higher | Lower | PWM only for basic systems |
| LiFePO4 suitability | Strongly preferred | Acceptable in simple builds | MPPT for most users |
The cold-weather voltage issue
This is a critical design point. Panel open-circuit voltage rises when the weather gets cold. So a PV string that looks safe on a mild day may exceed the controller’s input limit in winter mornings.
That means controller selection is not only about wattage. It is also about worst-case cold Voc. This is one of the easiest mistakes to miss, especially in cold climates. If the controller input limit is exceeded, the unit can fault or fail.
A simple controller decision rule
Use this quick logic:
- Choose the controller by maximum PV input voltage.
- Check winter string Voc, not just standard panel label values.
- Check maximum charge current against battery limits.
- Prefer MPPT unless the system is very small and tightly matched.
If the system is communication-based and the inverter already includes MPPT, then the choice may already be made for you. In that case, focus on confirming compatibility and proper battery communication.
LiFePO4 Solar Charge Settings (Bulk/Absorption/Float Voltage Guide)
In our QC checks, the most common LiFePO4 setup errors happen near full charge, where small voltage mistakes become big system problems.
LiFePO4 charge settings should follow cell count, not loose battery labels. For most systems, set bulk and absorption around 3.55 to 3.65 volts per cell, keep absorption short, use low or no float, disable equalization, and disable lead-acid style temperature compensation.
Typical voltage targets by system size
The usual pack structures are 4S for nominal 12V, 8S for nominal 24V, and 16S for nominal 48V. That gives these common target ranges:
| System | Cells in Series | Bulk / Absorption | Float or Restart | Hal menyamakan | Notes |
|---|---|---|---|---|---|
| 12V LiFePO4 | 4S | 14.2–14.6V | 13.5–13.6V or effectively disabled | Off | Most common small-system range |
| 24V LiFePO4 | 8S | 28.4–29.2V | 27.0–27.2V or low restart | Off | Scale 12V values by 2 |
| 48V LiFePO4 | 16S | 56.8–58.4V | 54.0–54.4V or low restart | Off | Scale 12V values by 4 |
These are practical ranges, not universal truth for every battery. The battery manufacturer’s manual still has the final word.
Bulk and absorption
Bulk is the stage where the charger delivers current until the battery reaches target voltage. Absorption is the stage where voltage is held steady for a limited time.
For LiFePO4, absorption is usually short. It may be only a few minutes in some systems, or up to around two hours depending on the battery, BMS, and balancing behavior. Long soaking at high voltage is usually unnecessary for LiFePO4. In many cases, the only reason to hold absorption at all is to allow cell balancing near full charge.
Float is not like lead-acid
LiFePO4 does not need continuous trickle charging like lead-acid. That is why float is often disabled, minimized, or treated more like a restart threshold. If the controller forces a float setting, many installers set it low, around 13.5V to 13.6V on a 12V system. That way the charger is not pushing the battery at a high holding voltage all day.
Equalization and temperature compensation
Equalization must be off. This is not optional. Equalization is a lead-acid maintenance behavior and should not be used for LiFePO4.
Temperature-compensated voltage adjustment should also be disabled in most LiFePO4 systems. Lead-acid batteries need that curve. LiFePO4 generally does not use the same voltage-compensation method.
Verify at the battery terminals
A smart installer checks the real voltage at the battery terminals during charging. This matters because the controller display may show the target voltage while cable loss keeps the battery below it.
So if you want accurate charging, do three things:
- Keep the cable short
- Use thick cable
- Use remote voltage sense when possible
That small detail often decides whether a system truly finishes charging or only looks like it does.
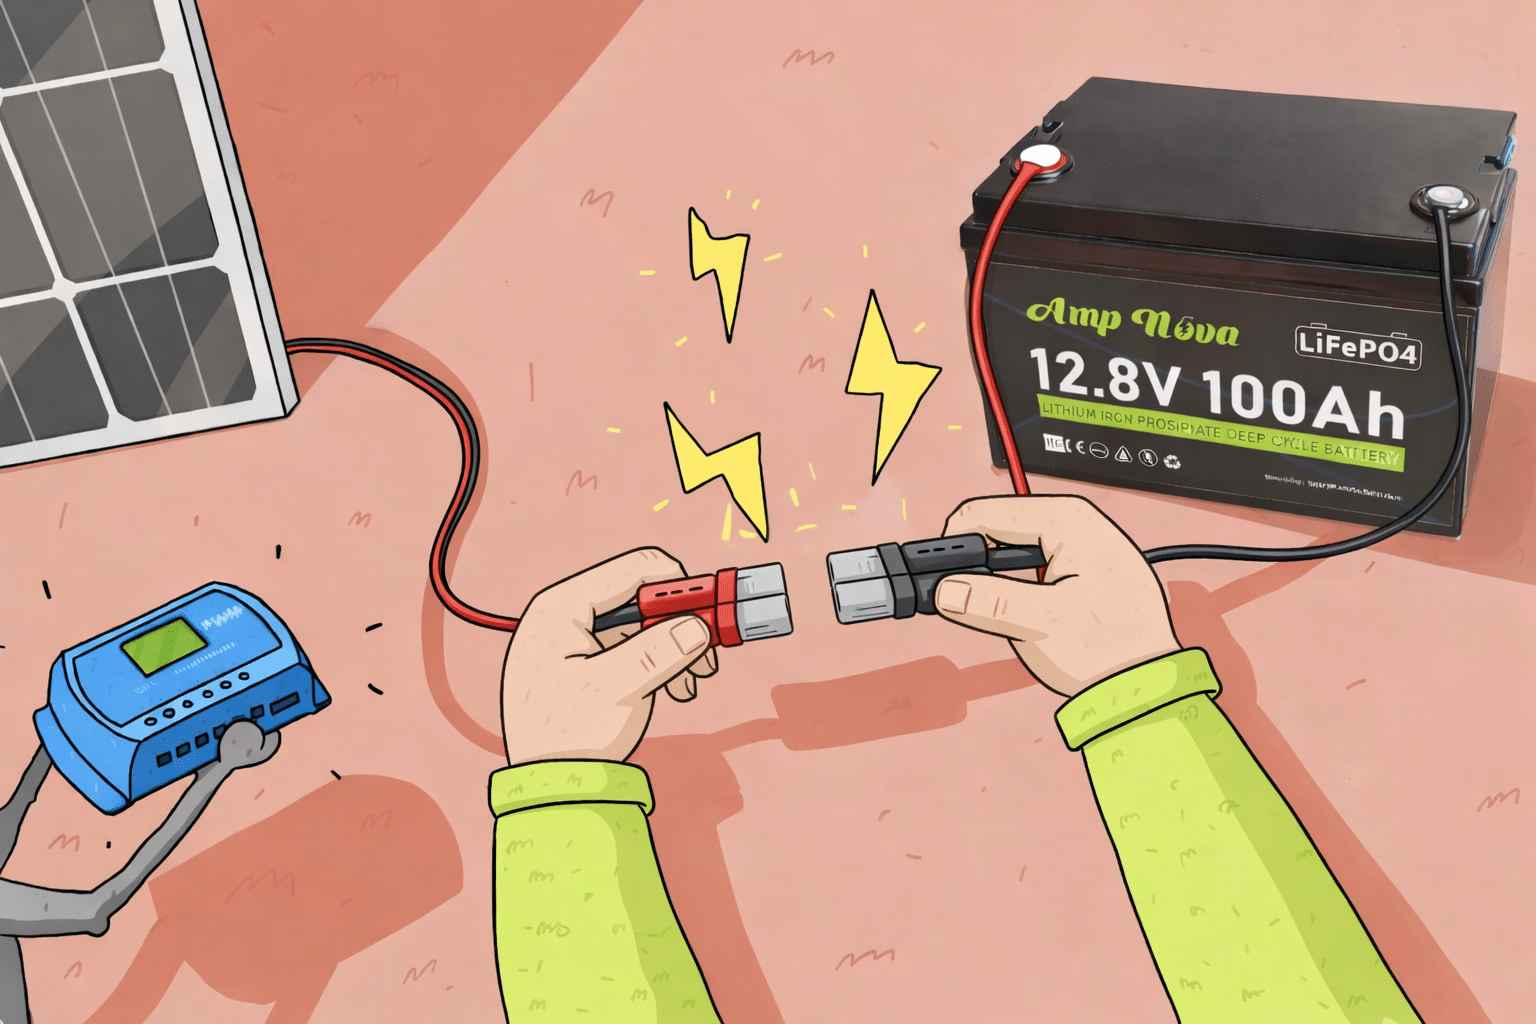
Step-by-Step Wiring: How to Connect Solar Panels to a LiFePO4 Battery
On our wiring benches, most installation errors are not complicated. They come from wrong connection order, missing protection, or poor battery-bank layout.
To connect solar panels to a LiFePO4 battery, wire the battery to the controller first, confirm polarity and protection, then connect the PV side, and verify settings before energizing the system. In parallel battery banks, use common busbars, equal-length cables, and one fuse per battery.
Step 1: Confirm the system design
Before touching any cable, confirm:
- Battery system voltage
- Battery chemistry
- Controller or inverter type
- Maximum battery charge current
- Maximum PV input voltage
- Whether battery communication is used
- Whether the inverter already includes solar charging
This avoids a very common mistake: adding a separate solar controller when the inverter already has one built in.
Step 2: Connect battery to controller first
Most controllers need battery connection first so they can detect the system voltage correctly. Connect the battery positive through the correct fuse or breaker. Then connect the battery negative.
Keep this cable run short and thick. If you use remote voltage sense, land it close to the battery terminals or the main DC bus.
Step 3: Program the lithium settings
Before bringing in PV power, load the LiFePO4 profile or enter custom settings:
- Bulk or absorption voltage
- Absorption time
- Float or restart voltage
- Equalization off
- Temperature compensation off
- Current limit if needed
If the system uses battery communication, confirm that communication is actually working. Do not assume it is active just because the cable is plugged in.
Step 4: Connect the PV input
After the battery side is correct, connect the solar input through the proper disconnects and protection required by the design and local code. Check string polarity. Check open-circuit voltage. In cold climates, confirm worst-case Voc, not just warm-weather values.
Step 5: Wire parallel batteries properly
When using multiple LiFePO4 batteries in parallel:
- Give each battery its own fuse or breaker
- Use equal-length positive cables
- Use equal-length negative cables
- Land all batteries on common busbars
- Avoid daisy-chain layouts
This reduces unequal current sharing. It also lowers the chance that one battery’s BMS carries too much current and trips early.
Step 6: Commission the system
Use this quick commissioning checklist:
| Check | Why It Matters | Pass/Fail Goal |
|---|---|---|
| Battery profile is LiFePO4 | Prevents wrong algorithm | Pass |
| Equalization is off | Protects lithium cells | Pass |
| Temperature compensation is off | Avoids bad voltage shifts | Pass |
| Low-temp charge protection works | Prevents cold charging damage | Pass |
| Battery terminal voltage matches charger closely | Confirms low cable drop | Pass |
| Inverter cutoff is above BMS emergency cutoff | Prevents hard trips under load | Pass |
| Charge current fits battery spec | Protects battery and BMS | Pass |
A clean wiring job is only half the job. Correct settings complete the system.
Safety Tips and Common Mistakes (Low-Temperature Charging, Overvoltage, Cutoffs)
In our service records, the worst LiFePO4 failures usually come from simple design mistakes, not rare component defects.
The main LiFePO4 charging risks are charging when the battery is too cold, pushing too much voltage or current, exceeding the controller’s PV input limit in cold weather, and relying on BMS hard disconnects as normal operation. A good system prevents these conditions before the BMS has to step in.
Low-temperature charging is a real risk
A common safe charging range for LiFePO4 is about 0°C to 45°C. Many batteries should not be charged below freezing. Some batteries include low-temperature charge protection in the BMS. Some include internal heaters. Some systems use an external heater controlled by a thermostat or the BMS.
If the site is cold, design for that from the start. In some cases, PV power can first run a battery heater until the pack reaches a safe temperature. Only then should charging begin.
Overvoltage comes from two sides
There are two main overvoltage risks.
The first is on the battery side. Wrong bulk voltage, equalization turned on, or lead-acid settings left in place can overcharge the battery.
The second is on the PV side. If you ignore worst-case cold Voc, the array may exceed the controller’s input limit on cold mornings.
Both problems are preventable. Neither should ever be accepted as normal.
Do not use BMS trips as normal control
A BMS trip is an emergency event. It is not a healthy daily operating method.
The inverter low-voltage cutoff should sit above the BMS hard cutoff. Loads should shut down cleanly before the BMS opens the circuit. If the BMS disconnects under load, the result can be resets, arcing, inverter faults, or unstable restart behavior.
That is why good systems coordinate cutoffs instead of waiting for the BMS to save the day.
Common mistakes and better fixes
| Mistake | What Happens | Better Fix |
|---|---|---|
| Using lead-acid charging profile | Wrong float, equalization, or compensation | Use LiFePO4 profile or custom settings |
| Charging below 0°C | Cell damage risk or BMS blocks charge | Add temp sensing, heater, or cutoff logic |
| Ignoring cable voltage drop | False full-charge reading | Shorter, thicker cable and voltage sense |
| Oversizing PV string voltage | Controller input fault in winter | Recalculate worst-case cold Voc |
| No per-battery fuse in parallel bank | Poor protection and uneven sharing | Fuse each battery separately |
| Inverter cutoff set too low | BMS hard trip under load | Raise inverter cutoff above BMS stop |
The practical safety rule
Here is the best field rule we use: do not let emergency protection become normal behavior.
That means:
- Do not let the BMS handle routine cutoffs
- Do not let the charger guess battery temperature
- Do not let the PV string run close to controller limits without cold-weather margin
- Do not trust defaults unless you confirmed they are for LiFePO4
Always check local codes and the actual product manuals before final commissioning. General guidance helps, but battery and inverter documentation should always win when there is a conflict.
Pertanyaan Umum
Can I connect solar panels directly to a LiFePO4 battery?
No. A controller or a properly designed hybrid inverter must regulate voltage and current between the solar panel and the battery. Direct connection is not a safe charging method.
Do LiFePO4 batteries need float charging?
Usually not in the lead-acid sense. Many systems use low float or effectively no float, with charging restarting only when battery voltage drops.
What is the best solar charge controller for LiFePO4?
In most cases, MPPT is the better choice. It gives better energy harvest, more flexible PV design, and better performance with modern modules.
What voltage should I use for a 12V LiFePO4 battery?
A common bulk and absorption target is 14.2V to 14.6V. A low float or restart setting is often around 13.5V to 13.6V if the controller requires one.
How long should absorption last on LiFePO4?
Usually much shorter than on lead-acid batteries. In many systems it lasts only long enough to complete the top of charge and allow balancing.
Can I charge LiFePO4 below freezing?
Usually no, unless the battery system is specifically designed for that condition with BMS logic or heating support. Many systems use 0°C as the lower charging limit.
Do I need a separate solar controller if my inverter already has one?
Not always. Many hybrid inverters already include MPPT charging. If communication with the battery works properly, much of the charging logic may already be handled inside the inverter.
How should I wire two or more LiFePO4 batteries in parallel?
Use equal-length cables, common busbars, and one fuse or breaker per battery. Avoid daisy-chaining if you want balanced current sharing.
Kesimpulan
Charge LiFePO4 with the right lithium profile, proper wiring, and coordinated cutoffs, then verify performance at the battery terminals before you call the job done.
Kontak Amp Nova to get more details.